Mold-Free Masterpieces: Expert Tips For Painting Over Mold
Dealing with mold before painting your home is crucial if you want to ensure a smooth and lasting finish. However, we know it’s not that easy to deal with, which is why we prepared this article for you.
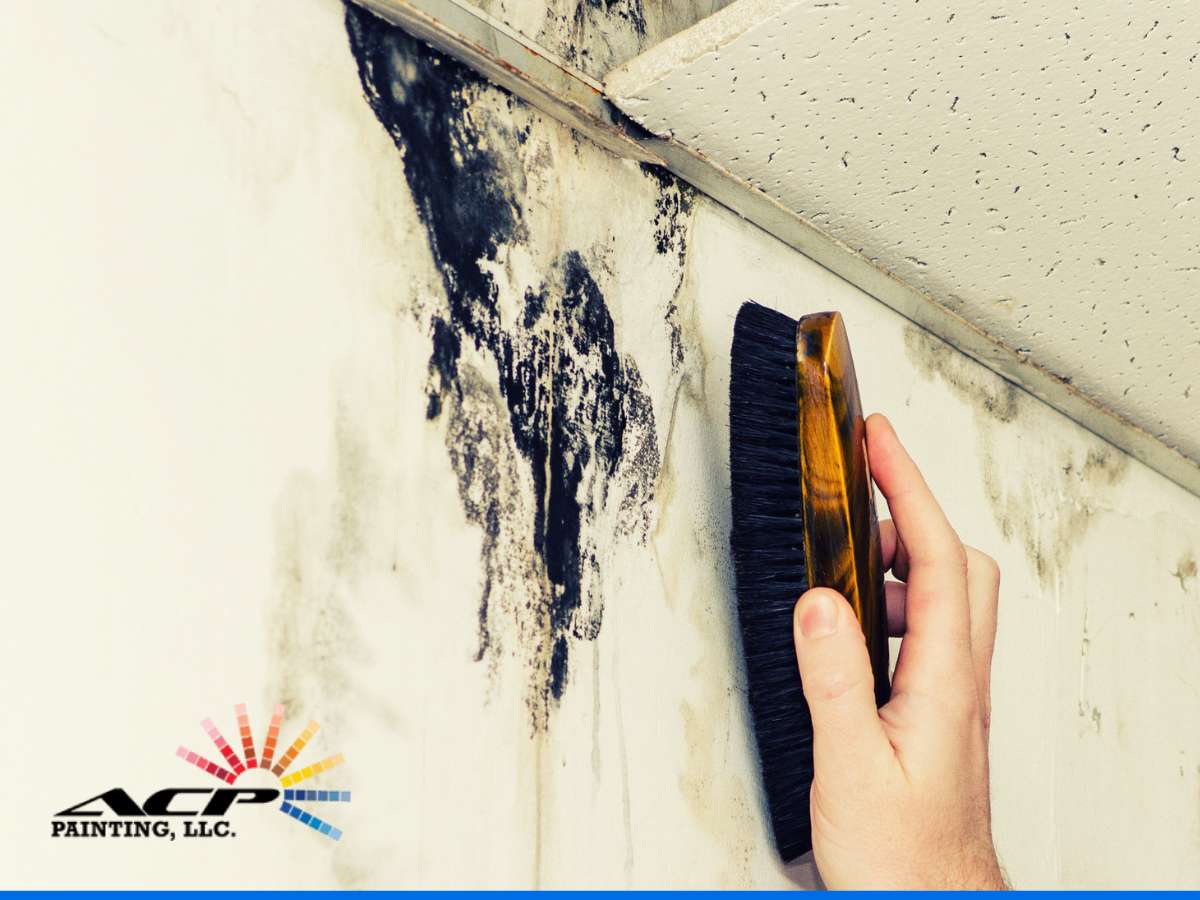
Mold not only mars the appearance of freshly painted walls but can also lead to health issues and structural damage if left untreated. Fortunately, tackling mold requires a few essential steps that include identifying the source of moisture and cleaning with the right tools or with the help of cabinet painting contractors.
Continue reading to learn the best practices for tackling mold, so your paint job looks as amazing as you imagined!
Identifying Mold: Key Signs To Watch For
Mold can be a dangerous and hidden danger to your house and your health, so it’s essential to identify it on time. Here are some signs that can help you detect mold before it becomes a nightmare at home:
- Strange Or Musty Odor: If you perceive a persistent, musty smell then be aware. This smell is often the first sign of mold, especially in poorly ventilated areas like bathrooms or basements.
- Visible Dark Spots: Mold usually appears as black, white, green, or gray spots on walls, floors, ceilings, and other surfaces. These spots can be small at first, but if you don’t treat them on time, they can get bigger and cover large areas.
- Water Damage: Keep an eye on areas that have been exposed to water or moisture, such as flooding or leaks, as they are the perfect place for mold growth.
- Peeling Paint Or Wallpaper: Molding behind walls can cause paint or wallpaper to bubble, peel, or crack. If you notice these signs, check your walls carefully as they might have mold somewhere. Remember that your painting contractors can help with this task.
- Allergic Reactions: Mold can trigger allergic reactions like sneezing, coughing, or skin irritation. If symptoms worsen in specific areas of your home, then be aware of mold presence.
- Condensation: Persistent condensation on windows, pipes, or walls can create an environment where mold thrives.
Tips For Reducing Mold Growth In Your House
Here are some tips to lower the risk of mold growth in your home:
- Use Dehumidifiers In Moist Areas: Dehumidifiers can help reduce moisture in the air, making them a good option for places like basements and bathrooms. We recommend keeping indoor humidity below 60%, ideally between 30-50%.
- Fix Leaks As Soon As Possible: Fix any leaks in roofs, walls, or plumbing as soon as you notice them to prevent mold from forming.
- Enhance Drainage: Make sure your house has proper drainage by keeping gutters and downspouts clear.
- Install Exhaust Fans: Place exhaust fans in bathrooms, kitchens, and laundry rooms to expel moisture outside.
- Let Fresh Air In: If the weather permits it, open windows to let fresh air circulate and reduce humidity levels.
- Keep Wet Areas Dry: Regularly dry areas prone to moisture, such as shower walls, sinks, and countertops.
- Monitor Water Damage: Check for any signs of water damage, leaks, and mold growth.
- Clean & Disinfect: We also recommend cleaning surfaces with mold-killing products. Focus on areas that are susceptible to moisture like bathrooms and kitchens
- Maintain HVAC Systems: Lastly, make sure to keep your HVAC systems in good condition. Don’t forget to clean or replace the filters to ensure they work efficiently.
How To Prepare The Surface For Painting
Once you tackle mold at home, you’re ready to continue with your surface preparation.
This part of the process varies depending on the type of surface, so we wrote here only the most essential steps to guarantee a clean surface. However, if you prefer to avoid this work, you can hire trusted metal painting contractors, as they have the skills and experience to prep the surface properly.
Clean The Surface
The first step is to remove dirt and clean well your walls with a mild detergent and water solution. Use a stronger cleaner for stubborn stains.
Once you’re done with the cleaning, rinse the surface with fresh water.
If you see mold during this step, clean the affected areas with a mixture of water and bleach (1 part bleach to 3 parts water).
Fill Holes & Sand The Patches
Use a putty knife to apply spackling paste and fill holes and cracks. You can also smooth the surface with the same putty knife.
Once the filler dries, sand the patched areas with fine-grit sandpaper to create an even surface.
Prime The Surface
Use the right primer for the surface you’re painting. For example, if you’re painting areas prone to moisture, use a mold-resistant primer.
Apply the primer with a brush or roller, but don’t forget to work softly to ensure an even coat. Let the primer dry completely before continuing with the painting process.
Do A Final Inspection
Put your hand over the primed surface to make sure it feels smooth and even. Address any rough spots or imperfections if necessary.
Why Hire Professional Painters For Mold & Paint Projects
If you’re looking for professional help for your next painting project, ACP Painting is ready to assist! Our Arizona Professional Painters team offers numerous painting services and guarantees that every detail is handled with care and precision. Whether you’re dealing with stubborn stains, old paint, or mold issues, we are ready to deal with it. Contact us now for more help!
![]()
ACP Painting, LLC.
20987 N John Wayne Pkwy
Maricopa, AZ 85139
Phone: 480-785-6323


